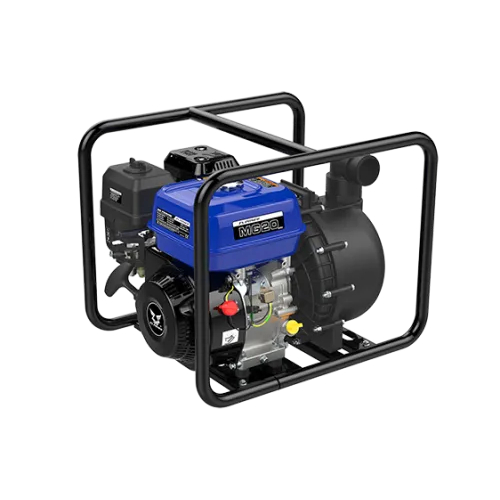
Understanding the different types of water pumps on the market is critical for any plumbing professional or DIY expert. Each type has a unique set of advantages and disadvantages to be aware of.
Here we touch on some frequently asked questions. Have another question? Contact us for more information.
Understanding Water Pumps
Each type of pump moves water differently, and the best choice depends on where your water source is and how you plan to use it.
Jet Pumps sit above the water source and use suction to pull water up — perfect for shallow wells, tanks, or situations where the pump needs to stay dry. They’re simple, reliable, and often used for garden or household water transfer.
Multistage Pumps also sit above the water but use multiple impellers to build higher pressure. This makes them ideal for larger homes, irrigation systems, or applications where steady, strong flow is important (like multiple bathrooms running at once). They’re quiet and energy-efficient too.
Submersible Pumps, on the other hand, live in the water — often inside a bore or deep tank. Because they push water rather than pull it, they’re extremely efficient for deep water sources or clean, pressurised delivery straight from the tank.
In short:
- Jet Pump | Good for shallow lift and simple setups
- Multistage Pump | Best for consistent high pressure
- Submersible Pump | Ideal for deep or sealed water sources
Still unsure which suits your setup? Reach out to the team at Tank Master — we’ll help match the right pump to your home or hobby farm.
Choosing the right pump isn’t just about picking the most powerful one — it’s about matching pressure and flow to your household or hobby farm needs.
Water pressure is measured in PSI or kPa and affects how strong the water feels when it comes out of taps, showers, or sprinklers. Too low, and showers will trickle; too high, and you could stress your pipes and fittings. Most homes are comfortable with 30–50 PSI (200–350 kPa), while larger properties with multiple bathrooms or irrigation systems might need higher.
Flow rate is the volume of water delivered over time, usually in litres per minute (L/min). Think of it like the width of the pipe — a wide pipe with a good pump gives plenty of water for multiple taps at once. For a small home or cabin, 10–15 L/min is often enough. Larger homes or hobby farms with irrigation or livestock might need 20–40 L/min or more.
To match your pump, make a simple list of all the fixtures and systems you plan to run at the same time. Then check the pump’s flow and pressure ratings — your goal is a pump that can comfortably handle the peak demand without constantly cycling on and off.
If you’re unsure about the right combination for your home or farm, contact Tank Master — our team can guide you to a pump that keeps water flowing smoothly without wasting energy.
Every pump has a natural limit to how far it can pull water up from a tank, bore, or well — this is called suction lift. Think of it like trying to suck water through a straw: the higher the water has to travel, the harder it is to move it.
For most domestic jet and multistage pumps, the practical suction lift is about 7–8 metres from the water surface to the pump inlet. Go higher, and the pump struggles, cavitation can occur, and you risk damaging the impeller. Submersible pumps don’t have this limit because they sit in the water and push it up instead of pulling it.
Other factors that affect suction lift include pipe diameter, number of bends, and friction. Narrow, long, or twisty pipes reduce how far the pump can draw water efficiently. Temperature and water quality can also play a small role, as hot or dirty water can make suction more difficult.
In short, suction lift matters if your pump is above the water source. To ensure smooth operation, always keep your pump within recommended limits and avoid unnecessary bends or restrictions in your suction pipe.
Not sure what suction lift works for your tank or bore? Contact Tank Master — we’ll help you choose the right pump and setup for safe, reliable water delivery.
When it comes to pumps, electricity isn’t just about the running wattage listed on the pump label — there’s also the start-up load, also known as inrush current. This is the extra burst of electricity a pump needs to get going, often several times higher than its normal running power.
For example, a 600W pump might pull 2–3 times that amount for a fraction of a second when it starts. This is important if you’re connecting the pump to a generator, solar system, or a shared circuit — the system must handle this initial spike without tripping fuses or overloading.
Running wattage, on the other hand, is the power the pump consumes once it’s up and operating normally. This is the figure that affects your electricity bill and the sizing of circuit protection. Pumps that cycle frequently or run for long periods will have a greater impact on your energy use, so efficiency matters.
To make sure your setup is safe and reliable, check both the starting and running power requirements and match them to your power source. Proper wiring and circuit protection are essential.
Not sure how to calculate the load for your pump or pick the right power setup? Reach out to Tank Master — we’ll guide you through safely powering your pump and keeping your system running smoothly.
A pressure controller is like the “brains” of your pump system. Its main job is to automatically switch your pump on and off to maintain a steady water pressure in your pipes.
When you open a tap, the pressure in the system drops. The pressure controller senses this and tells the pump to start delivering water. Once the tap is closed and the system pressure reaches the set level, the controller turns the pump off again. This prevents your pump from running continuously and keeps water pressure consistent for showers, taps, and irrigation.
Some pressure controllers also have built-in protection features, such as preventing the pump from running dry or cycling too frequently, which helps prolong the pump’s life. They’re available for different types of pumps, including domestic jet, multistage, and submersible models.
In short, a pressure controller makes your pump operation automatic, efficient, and safe, so you don’t have to manually turn it on or off every time you need water.
If you’re unsure which pressure controller suits your setup or how to install one, contact Tank Master — we’ll help you choose and set up the right controller for your system.
A VFD pump, or Variable Frequency Drive pump, is a smart type of pump that can adjust its speed to match your water demand. Unlike a regular pump that just switches on or off, a VFD pump varies its motor speed to provide exactly the right flow and pressure at any given moment.
This has a few big advantages:
- Energy efficiency: By running only as fast as needed, a VFD pump uses less electricity than a standard pump that runs full speed all the time.
- Gentle on plumbing: Gradual ramp-up and ramp-down reduce pressure spikes, protecting pipes, valves, and fixtures.
- Consistent pressure: Whether you’re using one tap or multiple taps, the pump maintains steady water pressure without cycling on and off constantly.
- Longer pump life: Smoother operation and reduced stress on the motor mean fewer repairs and a longer lifespan.
VFD pumps are especially useful for larger homes, hobby farms, or setups with fluctuating water demand, like irrigation systems or multiple bathrooms running at once.
If you’re wondering whether a VFD pump is right for your tank, household, or farm, contact Tank Master — we can help you decide and set it up for optimal performance.
Installation & Setup
A pressure tank is a key component in many domestic and hobby farm water systems. Its main job is to store water under pressure, so your pump doesn’t have to start every time you open a tap. This reduces pump cycling, saves energy, and prolongs the life of your pump.
Inside the tank is usually a bladder or diaphragm that separates water from a pocket of air. As the pump fills the tank, the air is compressed, creating pressure. When you open a tap, the compressed air pushes water out at a steady pressure.
Setting up a pressure tank is straightforward but important:
- Check the pre-charge pressure: Before installation, make sure the air pressure in the tank matches your pump’s cut-in pressure (usually 2 psi below the pump start pressure).
- Position the tank: Place it close to your pump on a level, stable surface, ideally above ground.
- Connect plumbing: Use appropriate fittings and isolation valves to connect the tank to your pump and water system.
- Test the system: Turn on the pump and check that the tank fills correctly and maintains pressure. Adjust the air charge if needed.
A correctly installed pressure tank keeps your system running smoothly, reduces wear on the pump, and ensures you always have water at the right pressure.
If you’re unsure about sizing, installation, or adjustments, contact Tank Master — we’ll guide you through the setup and make sure your system works perfectly.
A noisy pump can be annoying, but with a few simple steps, you can keep your water system running quietly and smoothly.
- Stable base: Place your pump on a solid, level surface like concrete or a sturdy platform. Soft or uneven surfaces can amplify vibrations.
- Vibration pads or mats: Use rubber or anti-vibration pads under the pump to absorb movement and reduce noise transmission.
- Flexible connectors: Install flexible hoses or connectors between the pump and pipes to prevent vibrations from traveling through rigid plumbing.
- Pump cover or enclosure: A ventilated pump cover can help muffle sound while still allowing airflow for cooling.
- Check alignment and mounting: Ensure the pump and motor are correctly aligned and all bolts are tight - loose fittings can rattle and vibrate.
- Pipe supports: Secure pipes properly with clips or brackets to prevent them from vibrating against walls or the floor.
By taking these steps, your pump will run more quietly, last longer, and provide a more comfortable environment around your home or hobby farm.
For tailored advice on quiet pump installation or specific solutions for your system, contact Tank Master — we’ll help you set up your pump for smooth, low-noise operation.
Priming your pump is essential to get it running efficiently, especially for jet and multistage pumps that rely on suction. If your pump isn’t primed, it can run dry, overheat, or fail to deliver water. Here’s a simple step-by-step guide:
- Turn off power: Always start with the pump switched off and disconnected from power for safety.
- Close discharge valves: Ensure the outlet valve on your pump is closed to prevent water from immediately leaving the system.
- Fill the pump casing: Open the priming port (usually on top of the pump) and pour in clean water until it’s full. This removes air that could prevent the pump from drawing water.
- Check suction line: Make sure the pipe from the water source to the pump is full of water and free of air pockets. A dry suction line can stop the pump from priming.
- Close the priming port: Once full, securely tighten the priming cap to avoid leaks.
- Power on the pump: Switch on the pump and watch the pressure gauge or flow. The pump should start delivering water within a few seconds.
- Open discharge valve: Gradually open the outlet valve to allow water to flow into your system.
- Monitor operation: Listen and watch for steady flow. If the pump struggles or runs dry, turn it off and repeat the priming process.
Correct priming ensures your pump delivers water efficiently and prevents unnecessary wear.
If you’re unsure or your setup is more complex, contact Tank Master — we’ll guide you through priming and maintaining your pump safely.
Even a good pump can underperform if it isn’t installed correctly. Here are some common mistakes and tips to prevent them:
- Incorrect pump placement: Placing a pump too far from the water source or on an unstable surface can reduce suction and increase vibration. Always position your pump close to the tank or bore on a solid, level base.
- Poor suction pipe setup: Using long, narrow, or twisted pipes can restrict flow and make priming difficult. Keep suction lines short, straight, and well-supported. Always fill the line with water before starting the pump.
- No isolation valves: Without valves to isolate the pump or tank, maintenance becomes messy, and leaks or air can affect performance. Install ball valves on both the tank and pump outlet for easy control.
- Incorrect pressure settings: Pumps set too high or low can cycle excessively, overheat, or fail to deliver sufficient pressure. Check the manufacturer’s recommendations and use a pressure controller or pressure tank when needed.
- Ignoring vibration and noise: Not securing the pump or plumbing can cause rattling, noise, and premature wear. Use anti-vibration pads, flexible connectors, and pipe supports to reduce movement.
- Skipping priming: Failing to prime the pump properly leads to dry running, overheating, or airlocks. Always follow the correct priming steps before starting your pump.
Avoiding these mistakes will help your pump run efficiently, quietly, and for longer.
If you’re unsure about any step or want a system check, contact Tank Master — we’ll help you get your pump installed correctly for optimal performance.
If your pump keeps cycling on and off or the water pressure drops unexpectedly, it’s usually a sign that something in your system isn’t balanced. Here’s what to check and how to fix it:
- Pressure tank issues: A common cause is a pressure tank that’s lost its air charge or is too small. Without enough stored pressure, the pump starts and stops frequently. Check the tank’s pre-charge and size, and adjust or replace if needed.
- Leaks in the system: Even a small leak in pipes, fittings, or taps can cause pressure loss and pump cycling. Inspect visible plumbing and listen for dripping or hissing sounds. Repair any leaks promptly.
- Faulty pressure switch or controller: The switch that turns your pump on and off may be incorrectly set, worn, or dirty. Test the settings and clean or replace the switch if it’s not responding correctly.
- Clogged or dirty filters: A blocked filter can reduce flow, causing the pump to work harder and cycle more. Check all inline or cartridge filters and clean or replace them regularly.
- Air in the system: Air pockets can cause fluctuating pressure. Bleed any trapped air from pipes and ensure suction lines are properly primed.
Addressing these issues usually restores steady pressure and smooth pump operation.
If you’re unsure what’s causing the problem in your system, contact Tank Master — our team can diagnose the issue and help get your pump running efficiently again.
A pump controller helps your pump maintain consistent water pressure without you having to manually switch it on or off. It monitors your system and tells the pump when to start and stop based on pressure levels.
Cut-in pressure is the point at which the controller switches the pump on. This happens when water pressure drops below a set level — for example, when you open a tap or run irrigation. Cut-out pressure is the point at which the controller switches the pump off, usually when the pressure in the system reaches the desired maximum.
Setting these pressures correctly ensures your pump delivers steady water flow without constantly cycling. Too high a cut-in can cause the pump to start too often, while too low a cut-out may result in weak water pressure.
Some controllers also include features like dry-run protection, which stops the pump if the tank runs empty, helping prevent damage.
Getting the cut-in and cut-out pressures right depends on your household or hobby farm needs and the pump type.
If you’re unsure what settings are ideal for your system or how to install a controller, contact Tank Master — we’ll help you set it up for reliable, efficient water supply.